Photo
2025-05-24
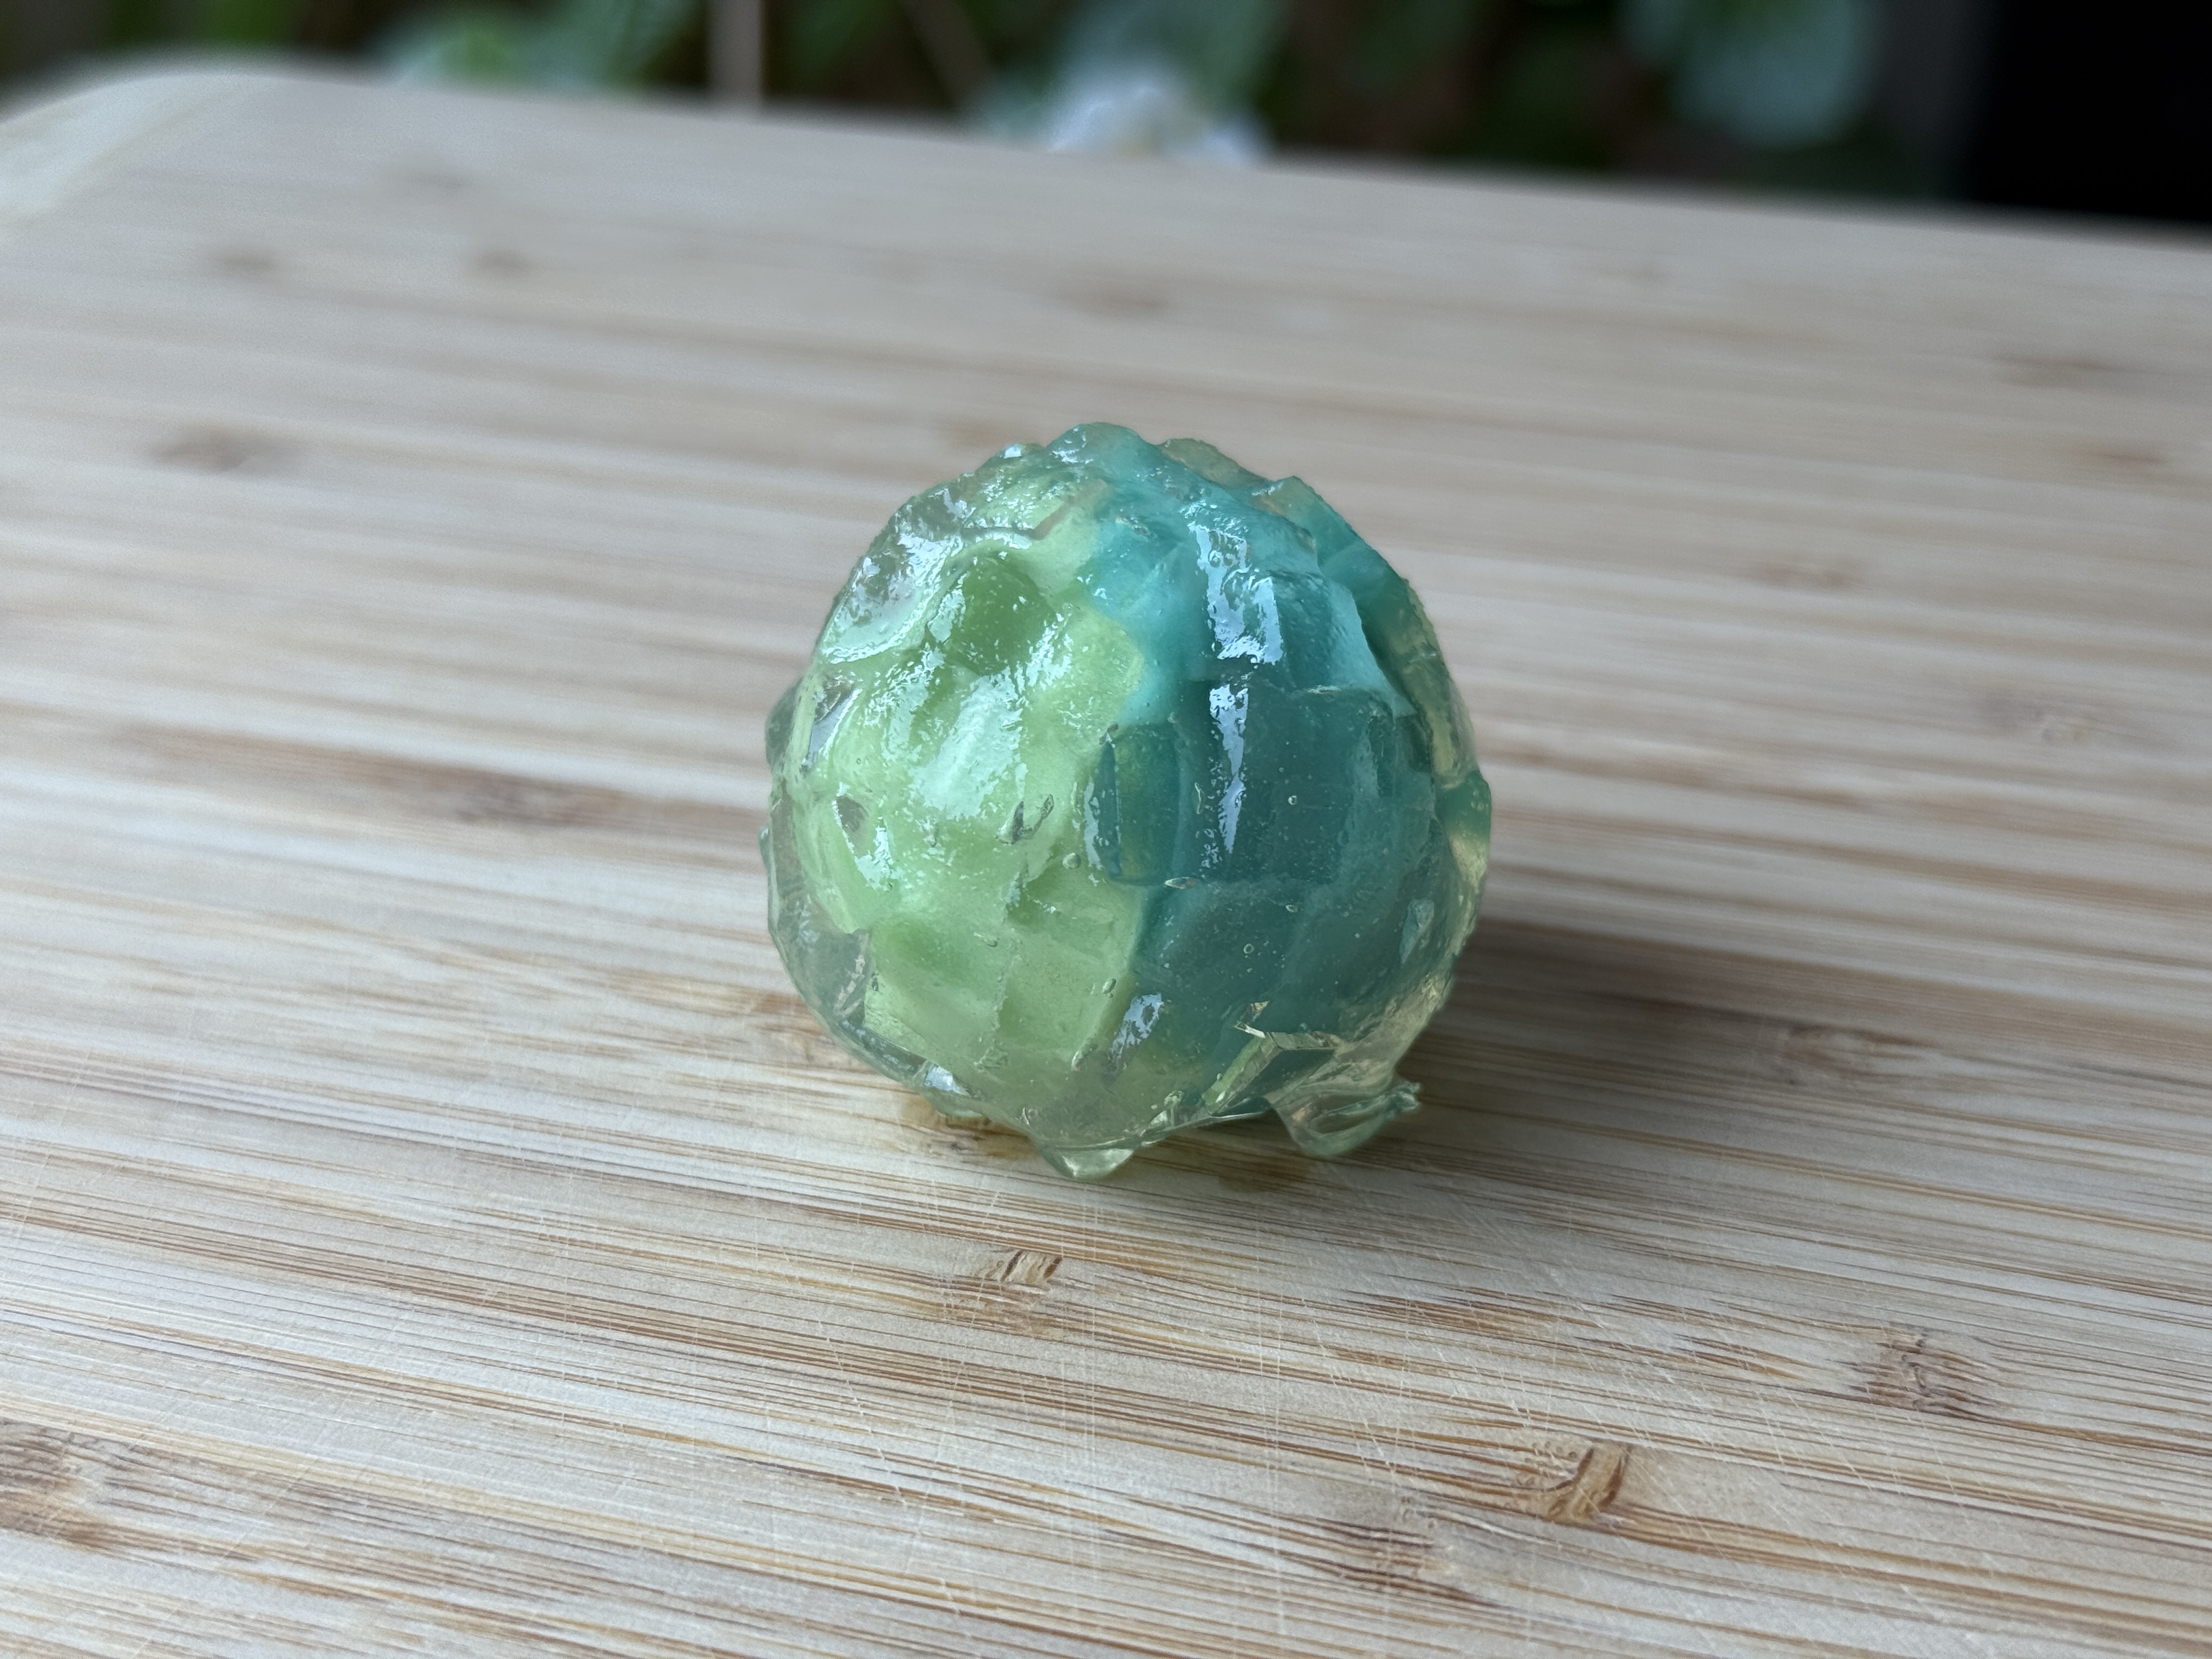
We skipped the Awayuki-kan this time, but otherwise we did the wrapping technique below (no kanten). Just make sure to press firmly and evenly with the plastic wrap. And it worked! It was stable enough too that we were able to put it on the cooling rack (and it din’t fall through the holes).
Notes:
- Jelly was too hard. The texture contrasted in a bad way against the soft shiroan. Reduce the kanten amount next time, maybe 2/3?
- The cubes lost a lot of their sharp edges after pouring the kingyokukan mixture. Maybe it would be better if we poured it while it’s less hot?
- Only one (big spoon) pour of kanten on top. Two spoonfuls softens the cubes too much.
2025-05-23
Used the black professional book recipe. Disaster. But good learnings.
Kanten recipe was their Kingyokukan recipe, mostly, on the previous page (116). Just cut in half:
- 7.5g kanten
- 500g water
- 350g granulated sugar
Add kanten and water while cold, then bring to boil, then add sugar, then take off once boiling.
I put that in our larger glass rectangular pyrex. Then I cut it into two sheets (very poorly), and that was great. Smaller cubes look better.
I used clear kanten, then half blue and half green (split down the middle) shiroan. Blue was mostly using teal gel food coloring, and green was using part leaf green and part yellow. The color was actually really nice.
NOTE
Make sure the shiroan is super dry. It turned out fine to make the two colors, then just throw the whole plate (with both colors on it) in the microwave for a minute to dehydrate a bit.
Trying to get the cubes on the balls was a nightmare. Things we tried that didn’t work:
- Wet the balls, then place the kanten on.
- Didn’t really help the sticking.
- Leave the balls dry, then place the kanten on.
- Painful, but the best option.
- Cover a whole bunch all at once.
- Love the optimism, but they all fall off.
- Dip the balls in kanten, then cover.
- This was promising, but it was really hard to get the kanten at the right level of set. Too early, and the cubes would just slide off because it was wet. Too late, and the kanten would set, and the cubes would just glide right off.
The only thing that really worked was Kristina putting the kanten on one at a time, painfully.
HOWEVER, we did discover a potential technique. Details below.
Lastly, the Awayuki-kan on the top was awful. I followed the book recipe, cut in half (one egg white + 1/3rd of the kingyokukan mixture from earlier), and that was so stiff. It wouldn’t pour.
I tripled the amount of kingyokukan mixture with the same amount of egg, and that was much better, but it was still too thick. Plus, it ended up looking really grainy when poured over. We think that we should be flipping this around: make kingyokukan mixture as usual, then slowly add egg white until it’s the right color. It should be almost completely liquid.
Potential wrapping technique
- Lay out a film of cubes on a plastic wrap (like kuzu).
- Make sure it’s about enough to cover the whole thing. You don’t get another shot.
- Note that the bottom will end up all square and aligned etc. So the top of the wrap should end up being the top of the sweet, where it’s a little more messy (in a nice way).
- Place the ball on the cubes.
- Wrap the plastic wrap around, like Mizu-botan.
I tried dipping the ball in wet kanten before doing this, and that kinda worked. But it was hard to get right. Kristina found a youtube video that shows them doing exactly this, but with a dry shiroan ball. They really squeeze the plastic wrap to dig the cubes into the shiro-an. This is probably the way.
Things to try next time
Don’t change, it worked well:
- Shiroan coloring etc and dryness was great.
- Clear cubes were great.
Try differently:
- Use the plastic wrap wrapping technique.
- Either give up and use clear kanten to cover, or try the idea earlier with significantly less meringue.