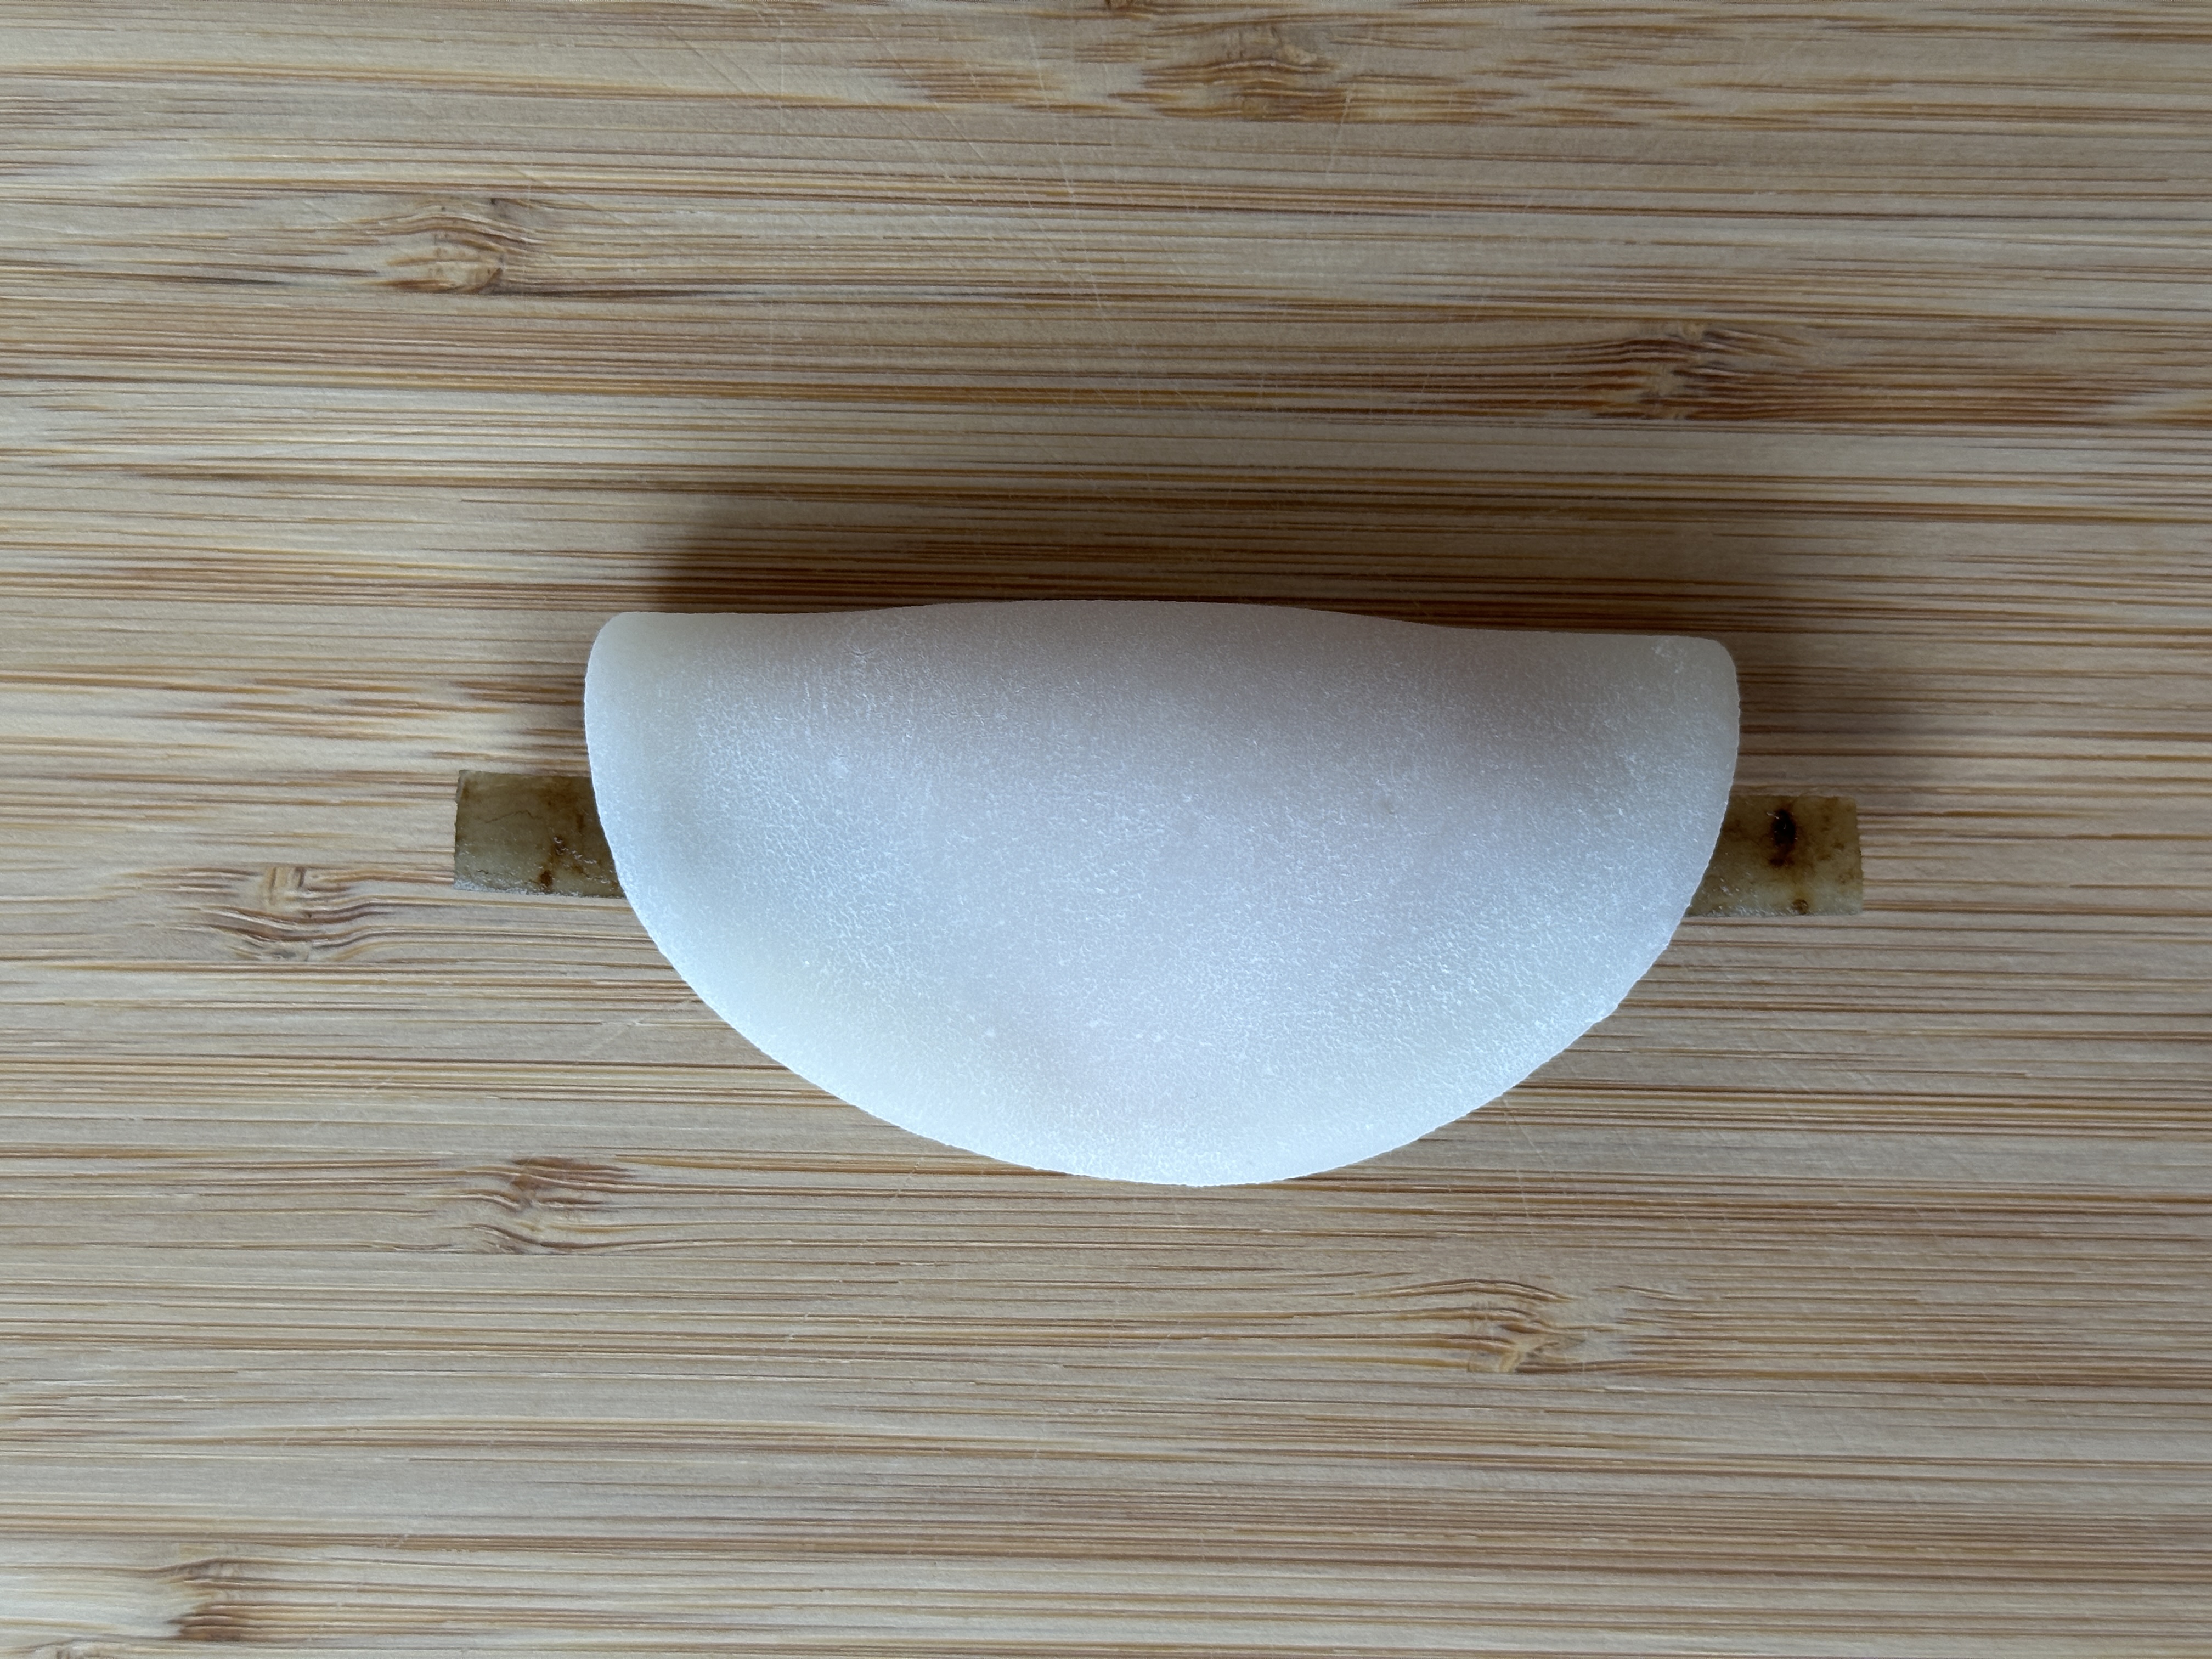
Photo
Recipe
Hatsudate 2025
To try next time
Nothing! This was great. Do this every time.
Assembly notes
- Only use 14-15g miso.
- It took about 50 minutes from start to finish. Plan accordingly!
- Placing:
- Place the red diamond directly in the center.
- Place the miso slightly below center. Smear it around a bit so it doesn’t spill out the front.
- Place the gobo in with the skin facing away (same as in the main notes) right into the center of the circle.
- Push the gobo in completely! Not just resting on the miso. Otherwise, the gobo will end up really low, relative to the shape of the half circle, in the final sweet

Gyuhi notes
- Used 25g instead of 30g.
- Put circles of gyuhi between pieces of parchment paper, instead of covering with katakuriko, stacking, and praying
- When cutting red gyuhi:
- Used the chef’s knife.
- Starts out as somewhat circular.
- Cut into 4.5cm wide strips.
- Trimmed the bottom of each strip.
- Realigned all of the strips so they’re contiguous
- Cut in a grid
- Make circles, not ellipses.
- I really like using thick gobo, because I think it makes the sweet taste better. But thick gobo + ellipses (ie wider body) makes it look too chunky.
- Using circles, which ends up making it look like a crescent moon when folded over, balances the thick gobo and makes it look delicate.
Miso-an notes
- Used 165g shiro-an and 42g saikyo miso (higher ratio).
Gobo notes
Made 2 nights before. Also tried making 5 nights before. In both cases, left them in the syrup in the fridge the whole time.
- 5 nights before lost a bit of crunch, added a bit of sweetness.
- 2 nights before had a little more vegetal taste, a little more crunch. Kinda preferred this.
On sizing:
- Thicker is better! I have a way to visually accommodate the thicker gobo (see gyuhi notes).
- Better to start from the thick end of the original gobo, rather than the thin end.
Steps are mostly the same as in the original recipe. Some modifications though.
- Scrub the exterior while submerged in cold water like below. I scrubbed pretty hard, removing most of the skin. I didn’t need to leave any for color.
- Soak in vinegar as below.
- Boil for 2 hours.
- This part differed. The dark color mostly comes from the yellow water that forms while boiling. So, every time the water got noticeably dark, I changed it.
- Ended up doing a water change every ~10m for the first hour, then a few more during the second hour.
- To keep the gobo cooking, I kept a kettle with hot water handy to replenish after fully draining the used water.
- Instead of dunking in cold water, let it stay in the final boil water until it comes to room temp.
- Then, once it’s not scalding hot, put in cold water and work with from there.
- Cut.
- Bring sugar and water to a boil first, then add cut gobo once boiling. Leave there for 3m on ripping high boil, then turn off heat and let it come down to room temp.
- Before boiling, wrap tightly in a coffee filter! That binds them together and helps keep their shape without rubber bands that leave indentations.
- Remove the gobo once cooled. Gently reduce the remaining syrup, then put gobo back in.
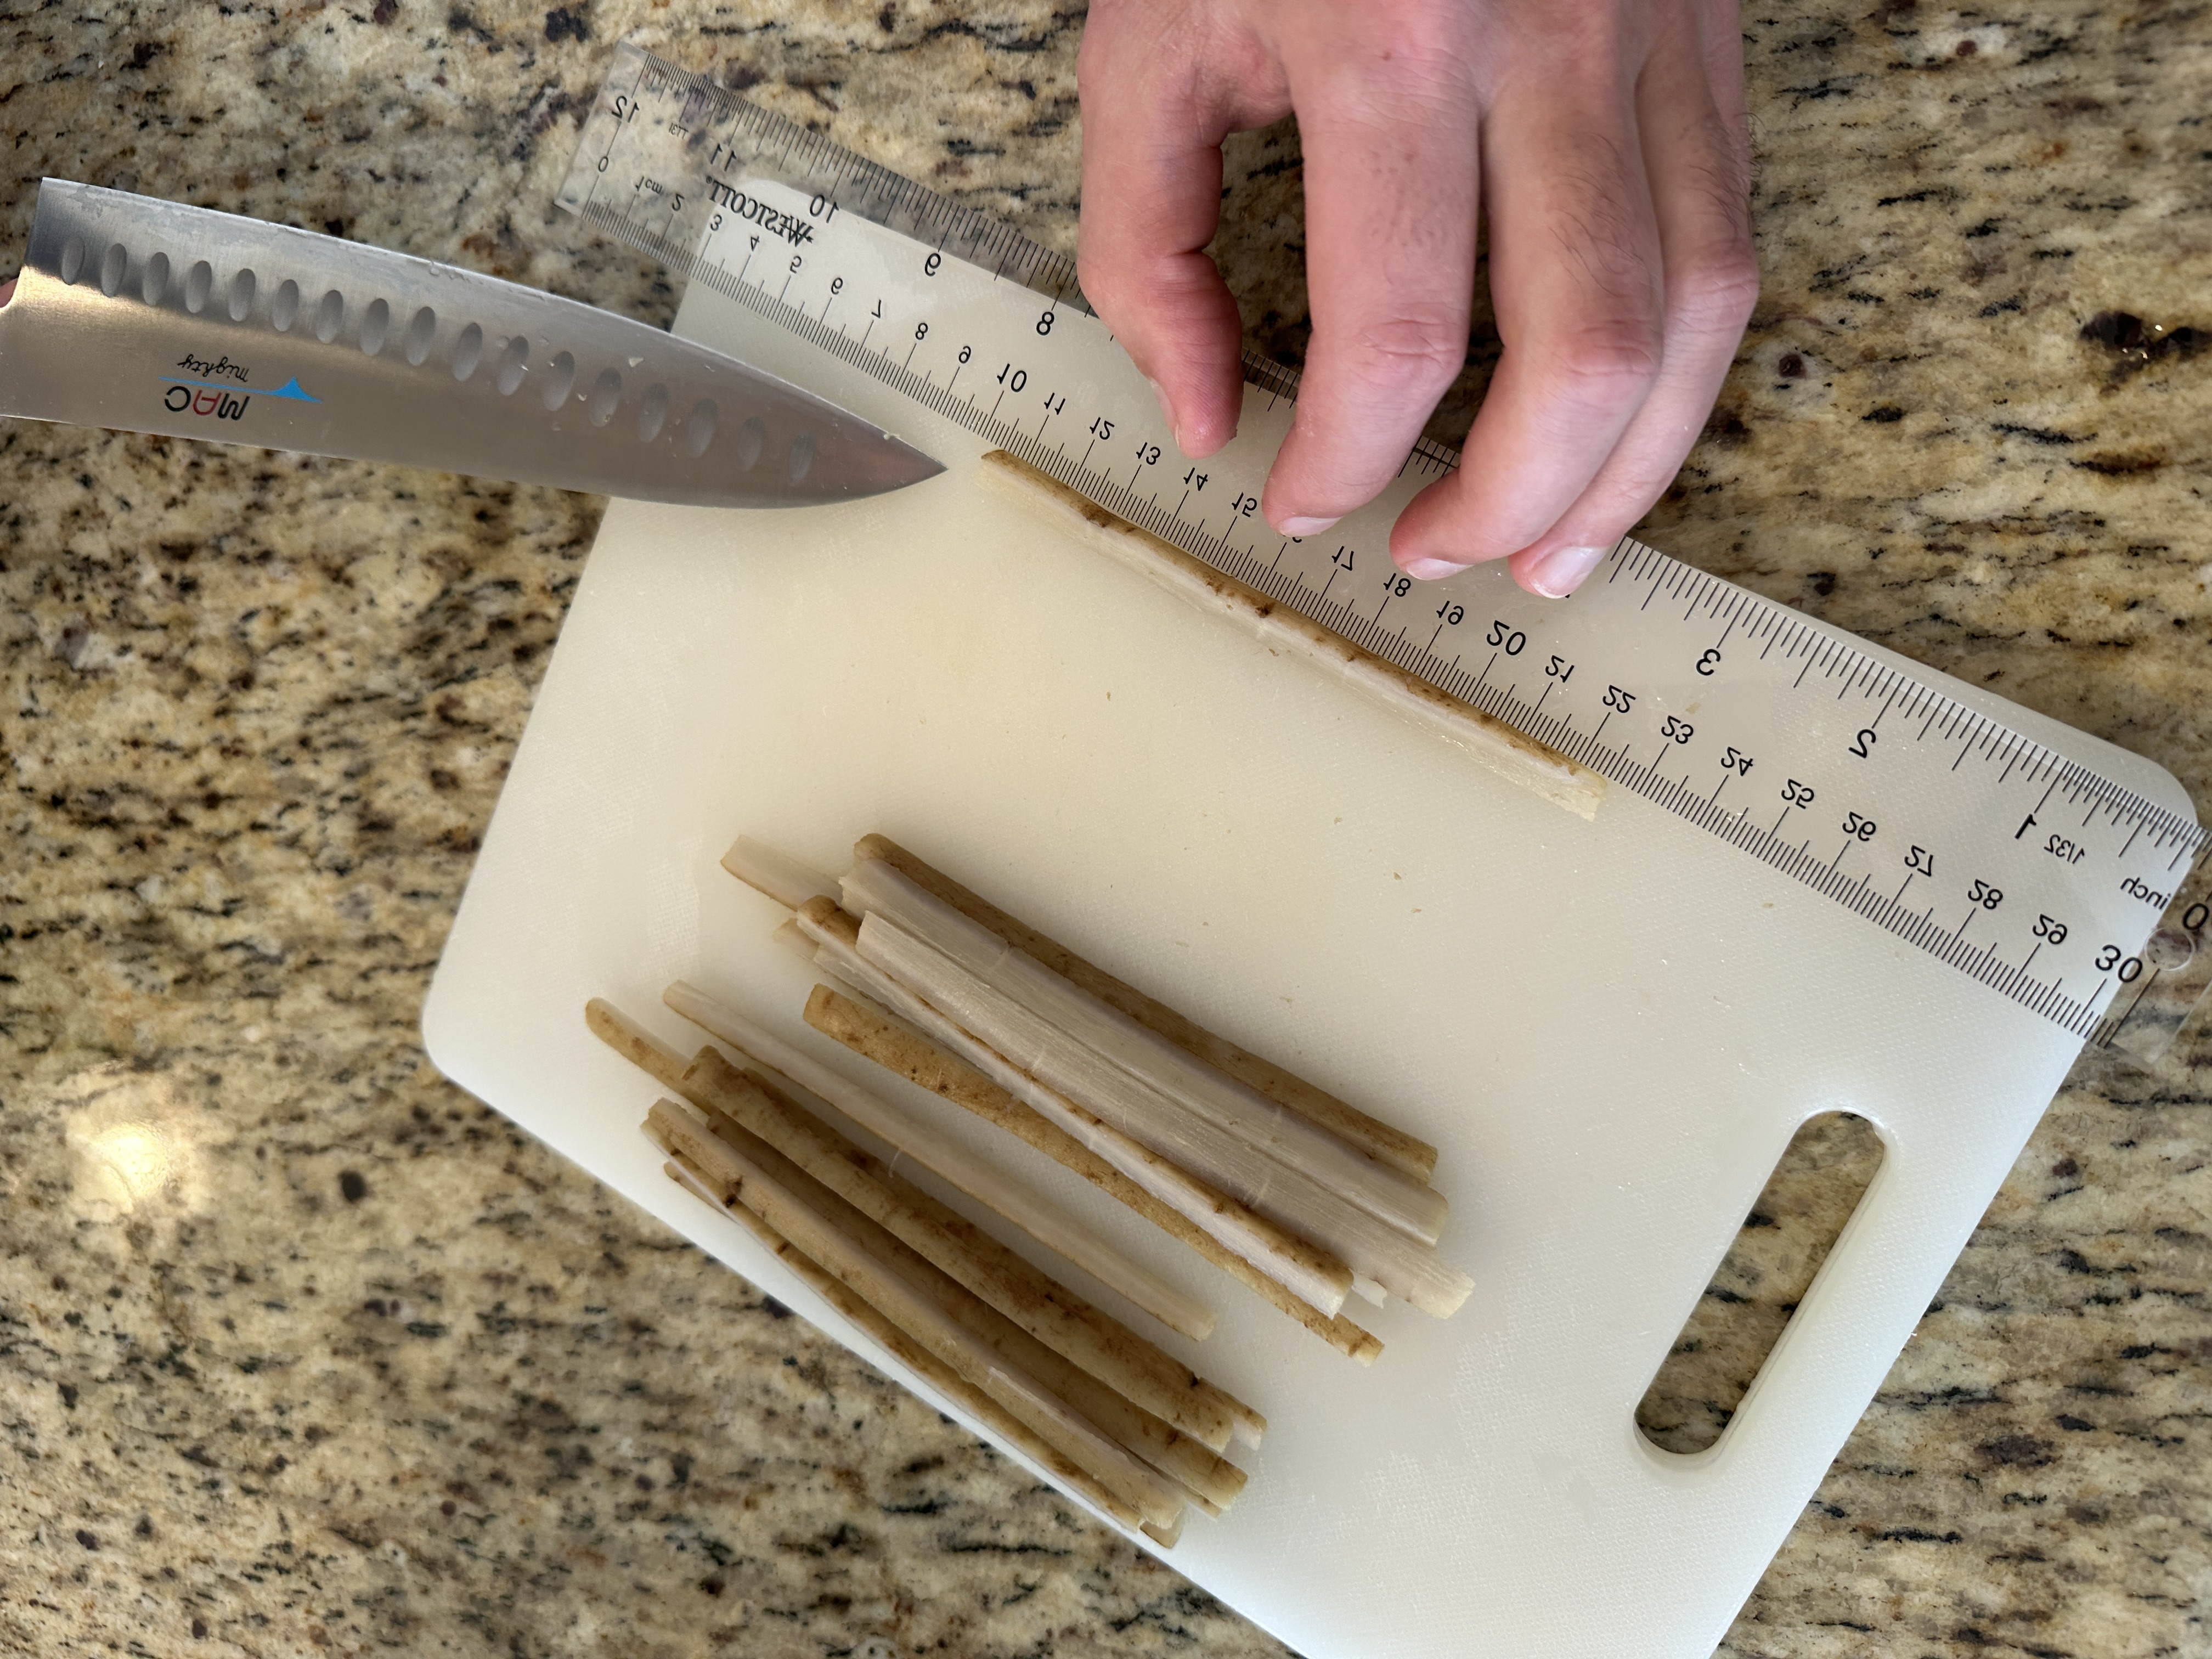
For cutting:
- Thicker raw gobo pieces are better, because you can cut them into 8ths (rather than needing to do trigonometry and cut 6ths).
- Steps:
- Cut the cylinder in half.
- Then, keeping the half all together, make your cuts. (I used our super sharp chef’s knife). This keeps the cuts much straighter, rather than making a cut → removing the cut piece → nothing to brace the remaining material against.
- Then, cut the triangle core:
- Just as earlier, don’t cut too deeply, otherwise it’ll curl in the sugar boil.
- Put the piece against a flat surface (I used the lip of the ruler) to keep it straight while cutting.
- Then cut everything into 10cm chunks.
Hatsudate 2024
Yielded 12 sweets.
Dimensions
- Gobo 10cm wide
- White gyuhi 8cm diameter circle (except actually slightly oval; ~8.5cm for the longer side)
- Red diamond in a 4.5cm square
Gyuhi
For white gyuhi (measured yield ~360g):
- 50g shiratamako
- 70g joshinko
- 100g sugar
- 230g water
2/3:
- 33g shiratamako
- 46g joshinko
- 66g sugar
- 153g water
1/3:
- 17g shiratamako
- 23g joshinko
- 33g sugar
- 76g water
For red diamond, halve the recipe for the white gyuhi.
Making the dough:
- Mix shiratamako and 100g of the water, and mix until the mixture is mostly uniform.
- There will be lots of little specks left, but that’s okay.
- NOTE: The reason you do this is specifically because it’s hard to get all the lumps out with too much water. Only add enough to rehydrate the shiratamako and knead out all the lumps.
- Add the joshinko and rest of the water (130g). Mix until uniform.
- Then add the rest of the sugar.
Cooking (this differ’s from Glenn’s way):
- Microwave as you would for regular mochi, including letting it rise a couple times etc.
For the white gyuhi:
- Pour out the gyuhi onto a katakuriko’d surface and dust the top as well.
- From here, “throw from the hump” and make 30g balls.
- Pinch off a ball, trying to keep the surface as smooth as possible.
- Try to keep the mass of mochi in a ball shape, rather than as a tube that you’re squeezing off. If you do it like a tube, it won’t come out with an even surface
- Roll out the dough like described under Dimensions.
- Don’t make it too elliptical! Just the tiniest bit, otherwise it will look unbalanced and flop over the front.
For the red gyuhi:
- Roll out into a sheet, then cut out squares. (I tried to keep mine rather thin, maybe 3mm).
Gobo
- Two 12cm lengths of gobo (or more, tbh)
- Vinegar (for soaking)
- Tons of sugar
- Rinsed rice water
Gobo followed wagashi lady’s recipe almost exactly.
- Cut the gobo into 12cm lengths (keeping it whole) and immerse in cold water while scrubbing the exterior.
- (I used the rough side of a new sponge for this).
- Once scrubbed, put the lengths of gobo into a mixture of vinegar and water (mostly water, a little vinegar) and soak for 20 minutes.
- Then, boil the gobo whole in starchy rise rinse water for 2 hours. Keep covered.
- (I don’t know what the starch water does, but it seems to work).
- Remove the gobo and throw away the used water. Put the gobo into a bath of tap-cold water for 10 minutes to bring down to a working temperature.
- Cut the gobo.
- Depending on the diameter of the piece, you can cut in 4/6/8ths. They should end up rather wide, maybe a centimeter or larger. (I did sixths.)
- Cut the wedges out, then cut off the sharp “inner” triangle point to make a trapezoid.
- Once everything is cut, line all the gobo up and cut down to 10cm uniformly.
- Bring a 1:1 sugar to water mixture to boil (maybe 200g:200g). Put the gobo in and leave on heat for 3m.
- Turn off the heat and let it naturally come down to room temperature (1hr?).
- Set the gobo aside, then reduce the sugar water until it’s a little more syrupy.
- Return the gobo to the syrup and let it sit however long you like.
- Overnight seems like a minimum. I did ~3 days.
Cutting the gobo
When you’re cutting off the triangle point, don’t cut it too thin! This is what causes curling! It needs to keep some girth while it’s boiling otherwise it’ll curl like that.
Rather than think about cutting a trapezoid, think about just cutting a sliver off to dull the point of the triangle. It will feel too big, but it works.
Miso an
280g shiro an, 60g saikyo miso. It tasted a little more miso-y than I wanted on its own, but in combination with the rest of the sweet, it’s perfect.
Add some water until it’s closer to a paste than to dough. You should be able to pick it up with a spoon and have it hold its shape, but also have it be soft enough that it’s really sticky and not formable into a ball or anything.
Serve with 20g portions.
Assembling
- Take the gobo out of the syrup and lay them on a plate. The goal isn’t for them to get totally dry, but more to let the big gobs of syrup fall off so they’re left with a thin, even coating.
- Lay out all of the rolled and cut skins (which should have been done the night before).
- Assembly:
- Place the diamond slightly higher than centered on the elliptical piece of white gyuhi.
- Place a 20g portion of miso-an just below center. Don’t spread or anything.
- Place the gobo with the skin facing away from you into the center, slightly pressing into the miso-an.
- Not up, not down, but away. When you roll the top over, the gobo will roll with it.
- Roll the top down. Don’t press any more than is necessary to maintain the shape (it’s not a dumpling).
Notes:
- The gobo will be really sticky. Best to wash your hands between putting the gobo on and touching the rest of the dough, as the mochi will stick to the tray otherwise.
Commentary for next time
- When laying out the flattened pieces of dough the night before (which is a game changer!), be sure they’re all lying flat. Stacking in pairs is fine, but you want to avoid:
- Stacking too much: they might stick to each other. Be sure to keep lots of katakuriko on them to keep this from happening.
- Overlapping: I tried overlapping them to all fit on a plate, and even though they were mostly flat, they ended up with indentations from where they overlapped. Better to have them completely flat.
- Gyuhi was nice, but a little less elastic than I would want. I should try mochiko next time instead and see if a little more elasticity is good.
- Could do for a little less mochi exterior. Maybe 28g? Also could do for a little less miso-an. Maybe 18g?
- Although, I loved how omotenashi these were. There was no holding back on them. Maybe keeping the 30g + hishi + 20g miso-an + gobo is the right thing.
Hatsudate 2023
I didn’t use Glenn’s recipe in 2023, but linking here.
Transclude of Hanabira-Mochi-1.doc
How to eat
In your hands, like a taco!